


blackstreet62
-
Posts
209 -
Joined
-
Last visited
Content Type
Profiles
Forums
Gallery
Events
Store
Posts posted by blackstreet62
-
-
update: well the sparks supplied to me by Stu are still firing well and smooth as a cod piece, no blips just a steady 900rpms when idling, and in this hot weather still holding up. so i would recommend them to anyone.
Ask Stu as he will point you in the right direction for sure.There do exactly whats said on the box. Edwin
-
 2
2
-
-
Thats a dirty big list Stu, he must have a brand new car there yes?
-
Lol ! I just looked at the company supplying the cheap exhausts ' Uncle Toms'..that says it all eh lo Doh?
-
1
-
-
Hi stu
I just purchased the red stuff,the other ones are really expensive mate.I'll give the red a run and see how it goes.I'll strip down brakes and pump some of the red in the rubbers to rase the pins .
-
Hi Guys
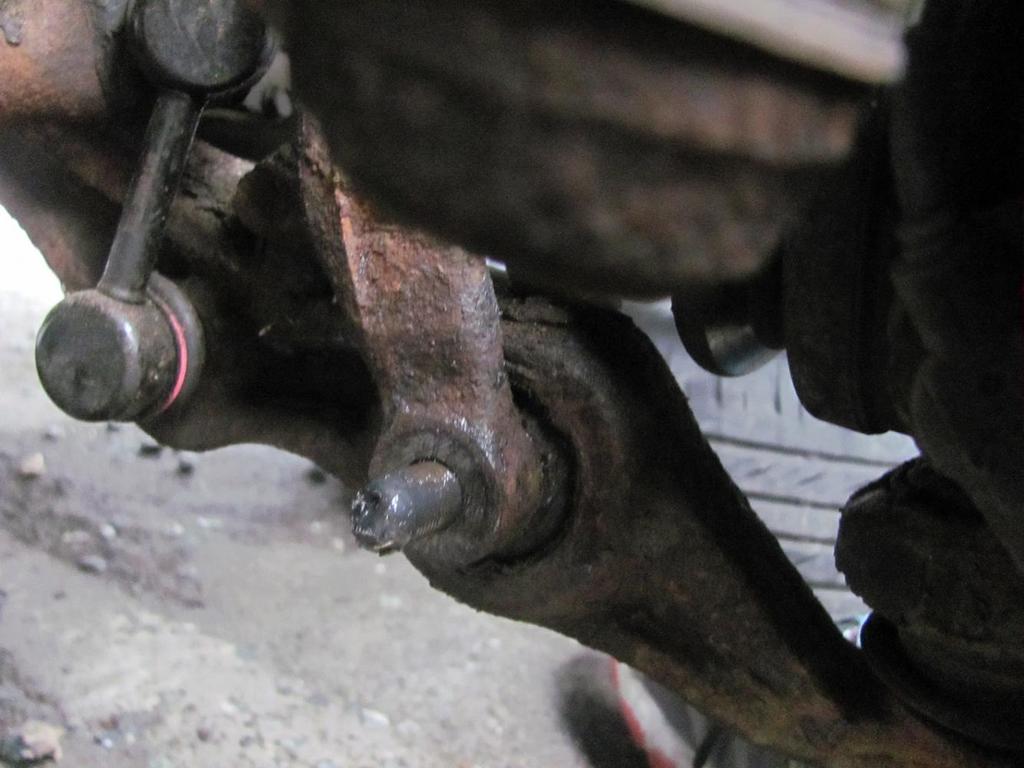
from looking at my piccys, do you think the rust on my suspension fork and lower wishbone arm is very badly rusted or just normal wear n tear? I have wire brush this and sprayed down with some comma wax seal spray, any thoughts guys???
-
Thanks guys,just trying to pass the love on..latest on knocks is that I'm believing its the Drop links,the filthy swines !ordered a new set and gonna swop over the anti roll bar bushes as well.well might as well while i'm there and there gonna be polyps to give a firmer ride.thanks again stu.
-
1
-
-
Hi Guys
3 weeks in and horns are still going strong and ....dare I say much better than original for sure....
-
2
-
-
mmm... didn't se that on the rear shelf BUT there sound the real deal when you turn it up.....
-
HI Guys
just gotta ask, very impressed with the sound system in my coupe, down the front trebles are starting to rattle, I read somewhere that "Bose speakers" where fitted on the coupes is that right?
Edwin
-
yes indeed Scooby, touch wood...all working fine !!
-
1
-
-
Hi guys
Well Sunday I took off the old ones which were oily and rusty.fitted the new ones I ordered by way of Scooby recommendation from E-Bay for a fiver.you get 2 x snail shaped horns ,one high and one low in pitch.when you beep there blend together in sound.these come with power and and earth spade connections. Original horn only has power as it takes its earth from the horn bolted to the car body ( thanks to Stu for the heads up) .I ran 2 x earth leads to the earth on my car battery for each horn and cut off the original connections and replaced with space connections.bolted the horns to the same place as the old ones using the same bolt. Did forget to say the bumper has to come off first lol? Well that helps a lot guys ! Test the horn 1st before you put the bumper on and bobs sure uncle new horn to terrorise the neighborhood.

-
2
-
-
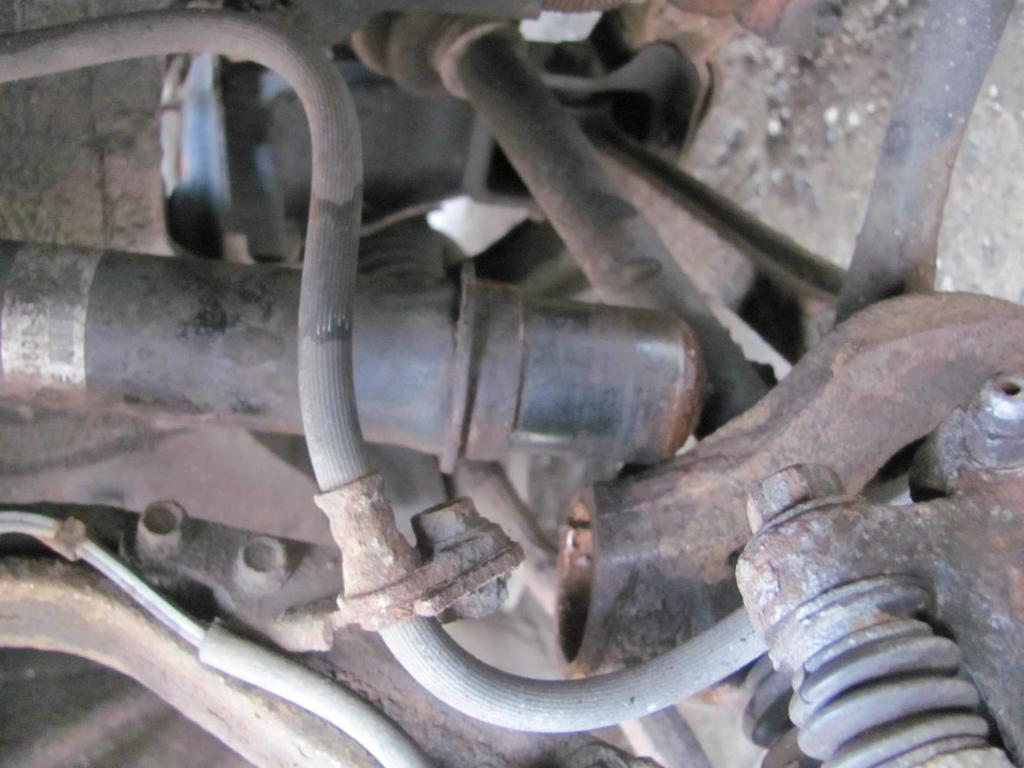
I've ordered a can of the wax oil for the cooler pipe Stu....
-
1
-
-
very interesting Stu, have logged this mate ...E
-
right !! I got my ac delco plugs , popped them in about 2 - 3 weeks ago and there've been really good, engine running smooth and no jerky idling. I'll report back in about another month or so if there's any change but for the Mo.....looking good.
-
2
-
-
Hey Cryistic
yes i'm with you... i 'm doing a 100ml a day,haven't felt a difference as yet but will push on with it as i guess this takes time yes?
Edwin
-
Right Guys My syringe came yesterday and its 100ml, so i withdrew 100ml and replaced it with genuine honda fluid (its Clear,is that right?), so i'll be doing that until the bottle is empty.when do you think i see some notice of change guys?also as the existring fuild is red and my HONDA fluid is Clear, would this be a problem?
Edwin
-
still got the knocking after fitting a new wishbone, which is like Chinese water torture...so gotta look to find where this knockings coming from...the search continues!!
-
Just gonna show you how I replaced the driver front side “Upper Wishbone Arms”. 1st I would say use a LOT of penetrating fluid to loosen up years of dirt, crap ,and rust that’s been thrown up there. Stu did say the driver’s side would be a bugger cos the there’s less room and the driveshaft boot might pop off and the bearings fall out when the when upper arm is out. So you need to strap the centre arm up straight once you got the shock and spring out. Right how I went about is as follows.
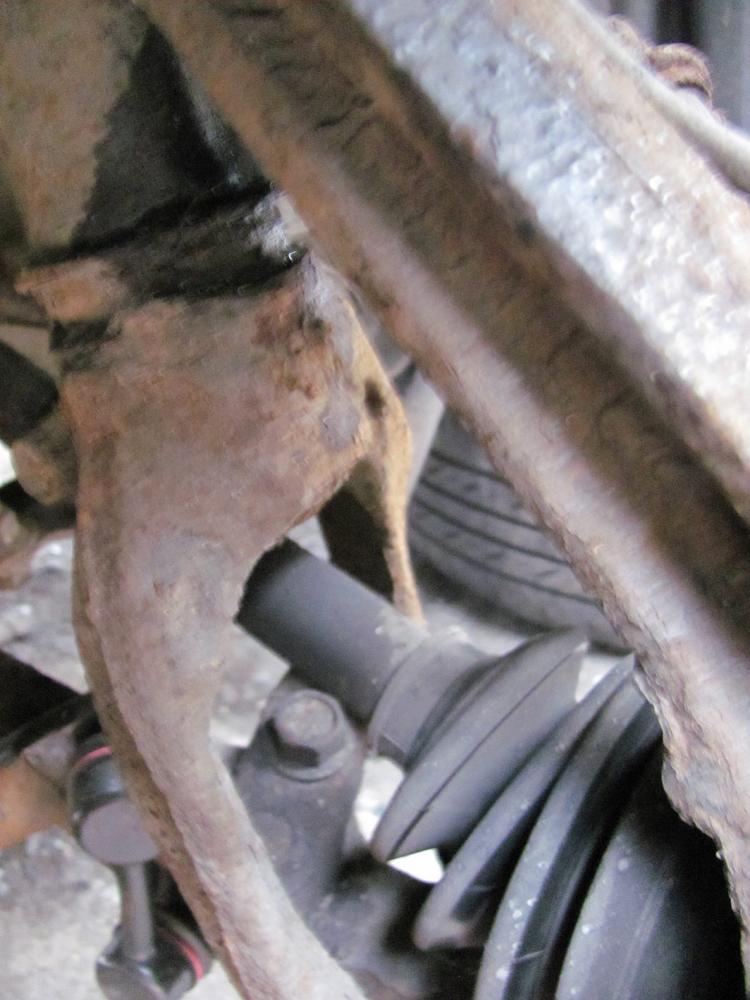
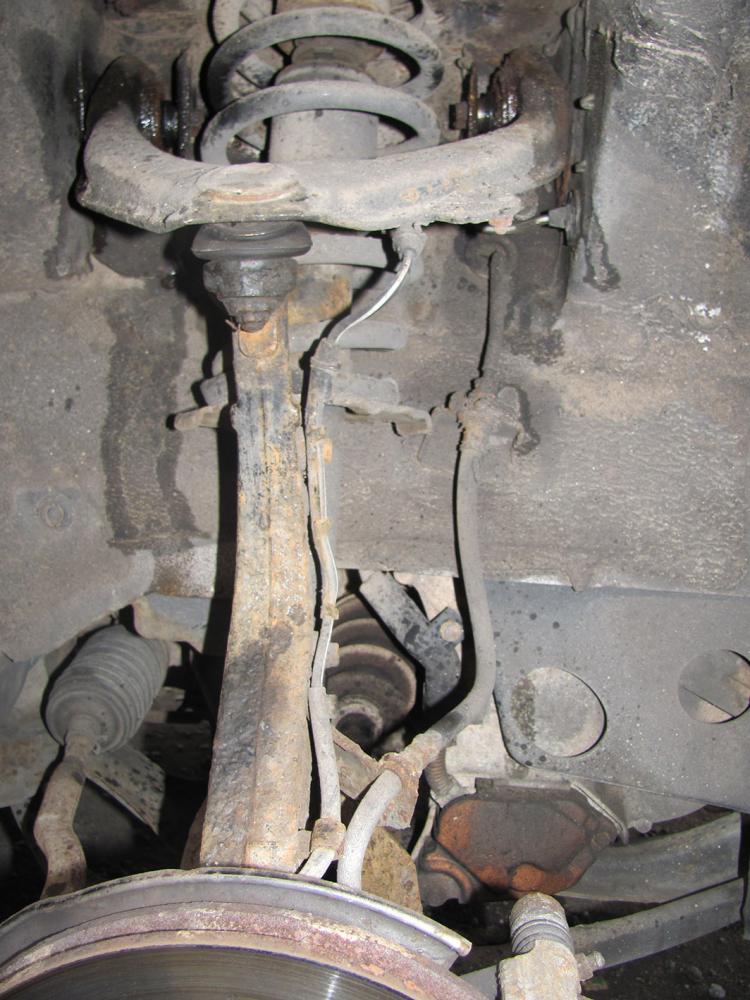
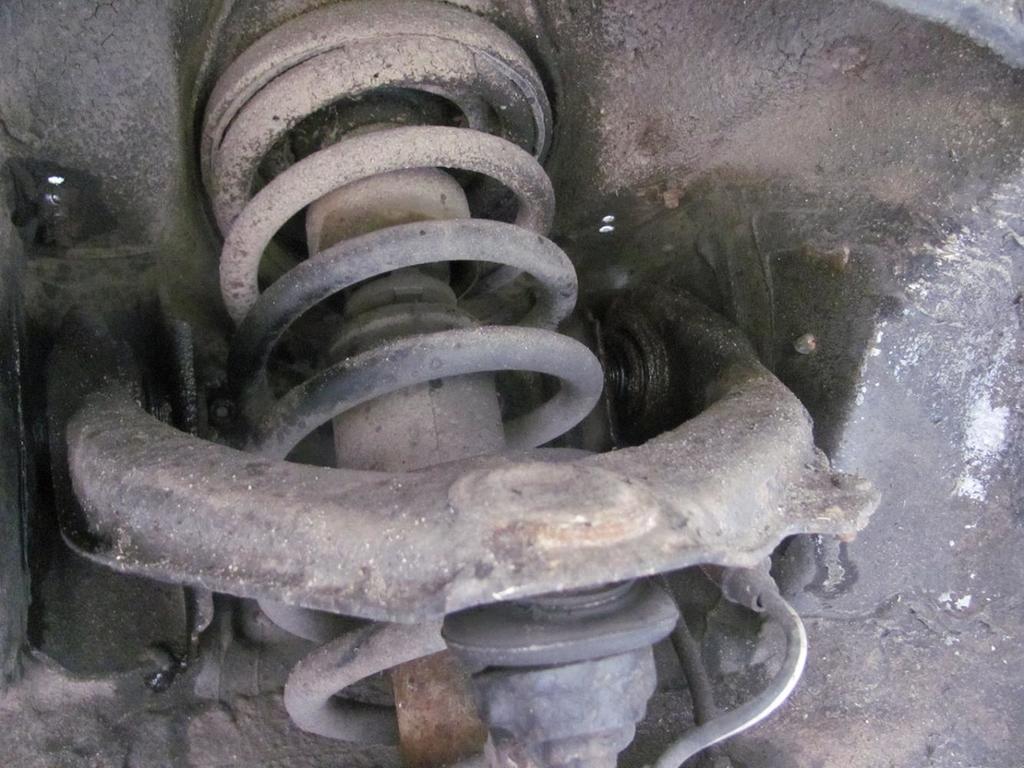
On the upper arm joint remove the split pin and then using a 17mm socket (you get a new castle nut and split pin with the new wishbone arm, well I did!). Also don’t take the nut off fully as you still want the arm to stay up. Go up into the engine bay and where the shock absorbers come up loosen the 5 x nuts (more spray?) – 3 are 14mm and 2 x 12mm if I remember right. Leave one bolt in and take the other 4 out so the shock is hanging on one bolt there. Right now the pain in the arse bit, to get the bottom part of the shock out with the fork bit you need to do the following; juice up the bolt the holds the fork to the bottom of shock. It will be seized and rusty so lots of fluid here.Undo nut and wack the body of the fork to shock the bottom of the shock out and the fork should come away. NOW the royal pain, the bottom of the fork is bolted to the bottom of the lower arm, it’s a long bolt going through the lower arm. Juice the hell at both ends and use a 17mm closed spanner and put on the right hand side bolt and jam it against a tie rod arm so it doesn’t move. Then use a 17mm socked and loosens off the left hand side nut. When this comes off use a hammer and knocks the bolt through, I did jack up under the lower arm to help the bolt through and juiced it as I went with penetrating fluid. Once that was out, you have to wiggle the bottom fork pushing the shock outta the way.
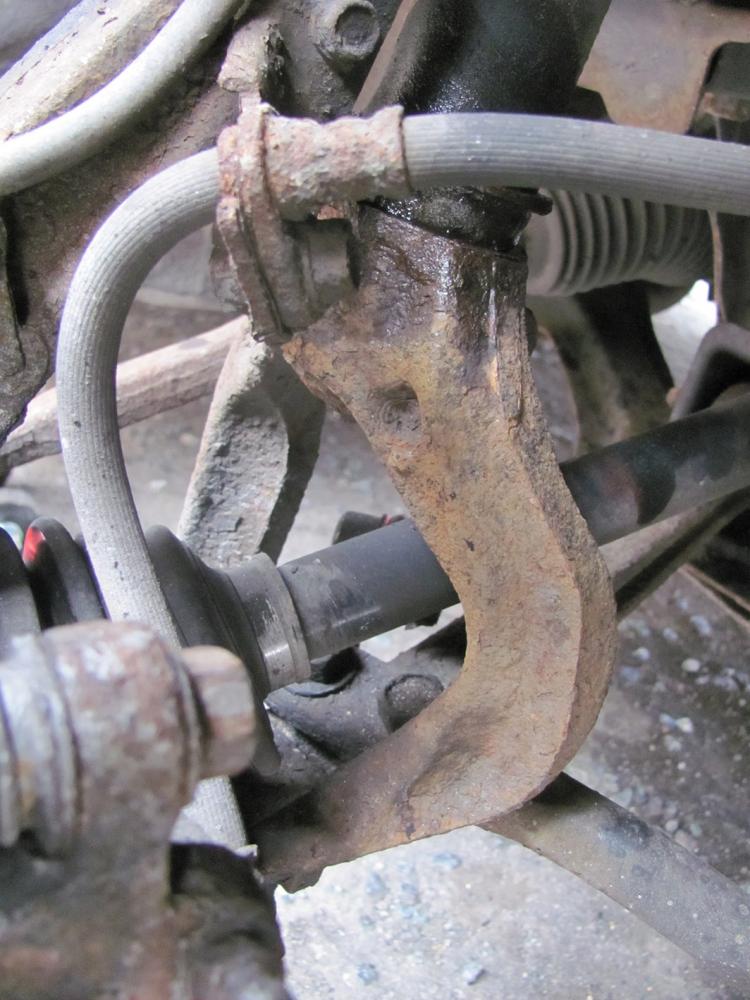
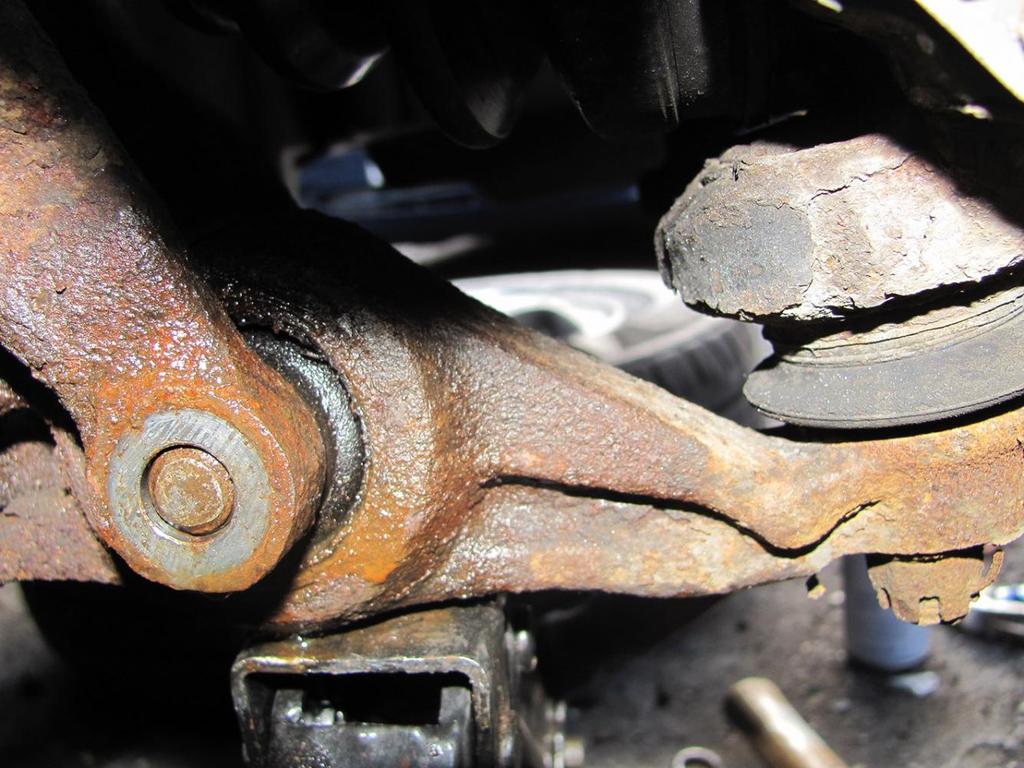
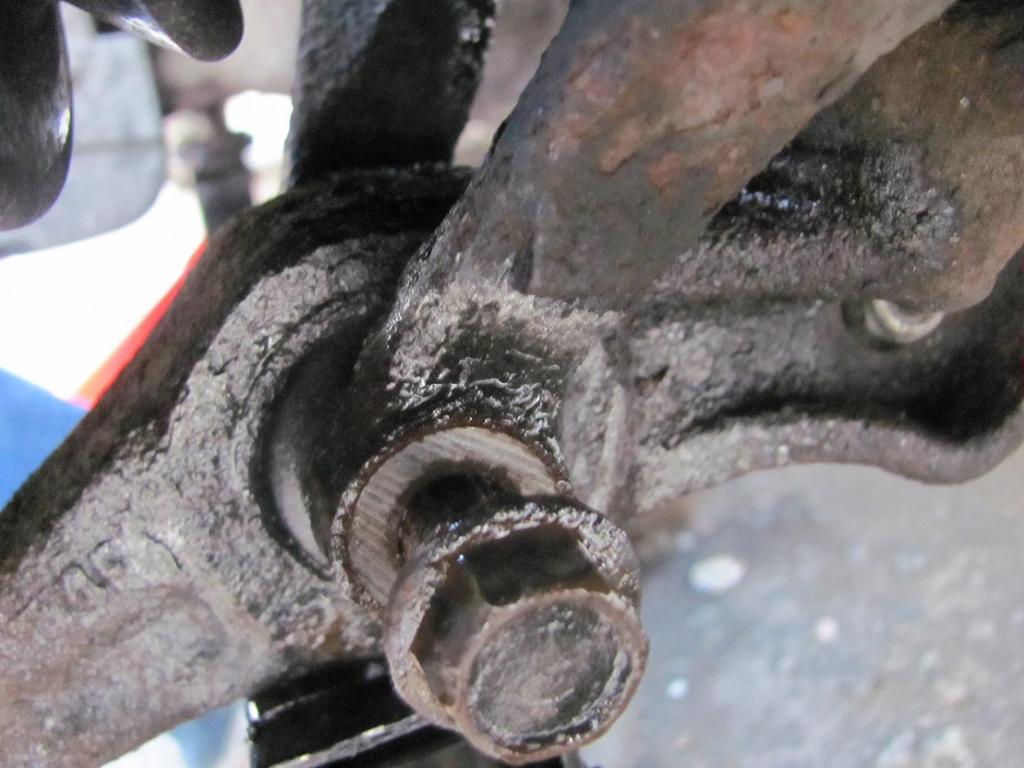
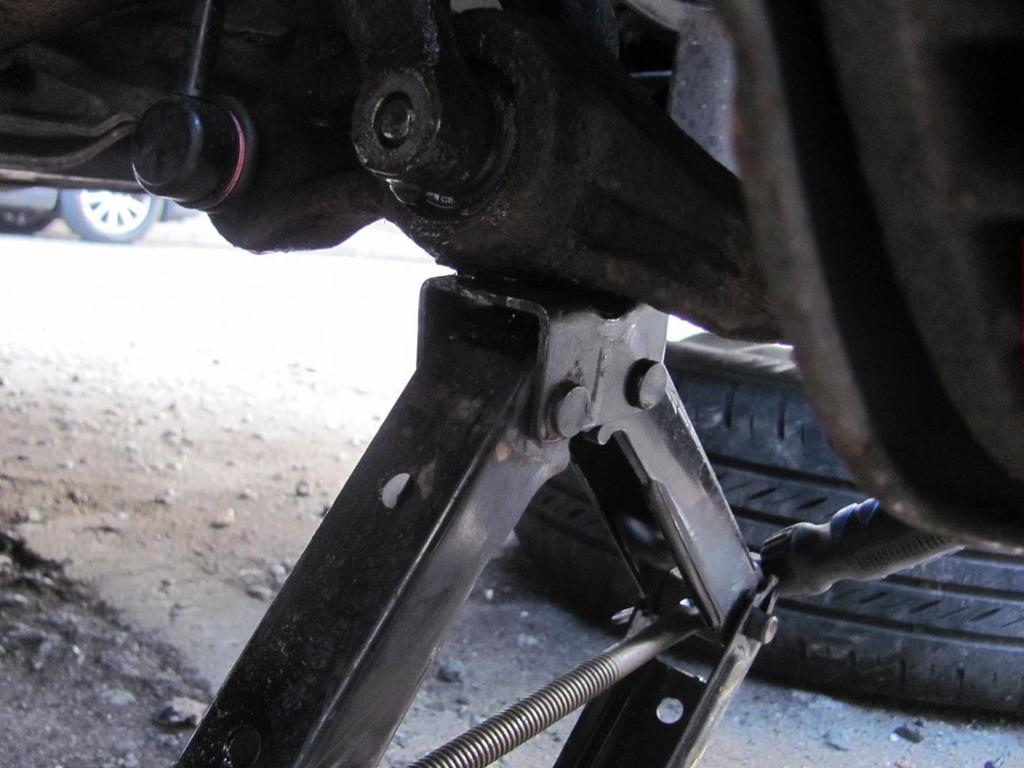
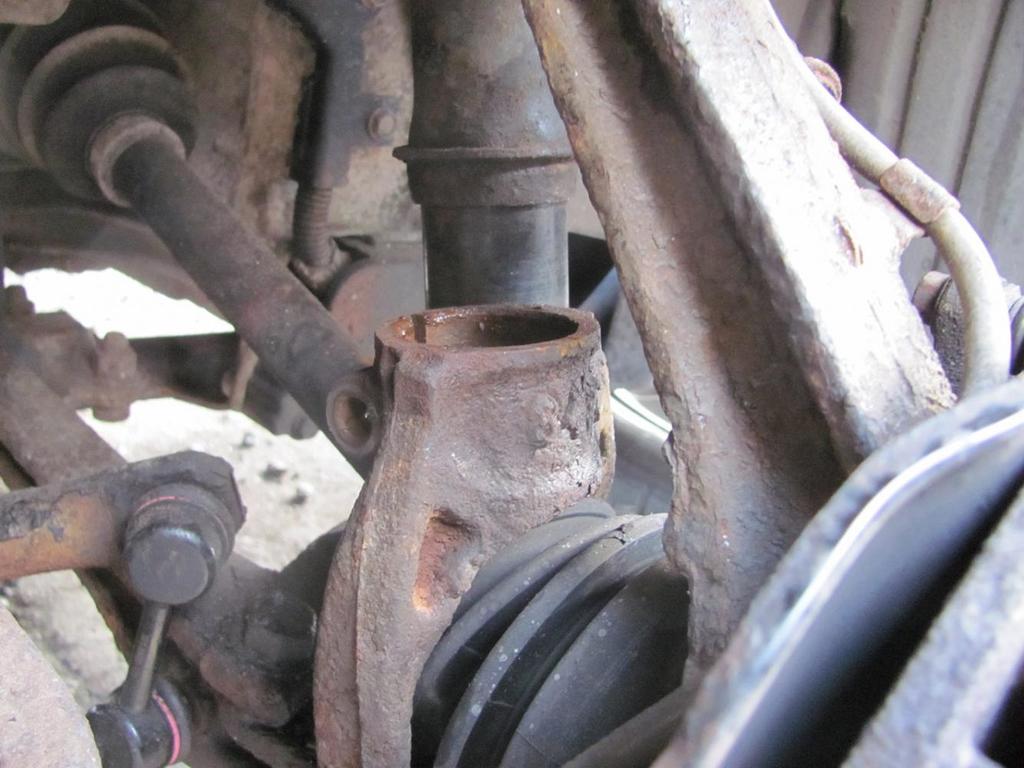
Once you got the bottom fork out, undo the last bolt off the shock in the engine bay, and take out the shock. Take out the 14mm bolts from the wishbone arm after taking the castle nut off 1st, making sure the strut doesn’t drop the driveshaft out. I recommend you strap the strut to the body of the car! Replace with a new arm but remember to grease up rubbers in the arm as there will squeak like mad when fitted. Put everything is reversal but getting that bolt back into the fork is a swine, so I creased up the bolt and then to push the shock down so it would line up the holes for the bolt to slide in easily I used a car jack above the wishbone and this pushed the wishbone down and in turn the shocks so the holes lined up and then I slide the bolt in and wacked with arm and bobs ure uncle…where in! Remember to toque up all bolts.

Put everything back as reversal, I hope that has been of some help to you guys, just giving back for you guys helping me out.
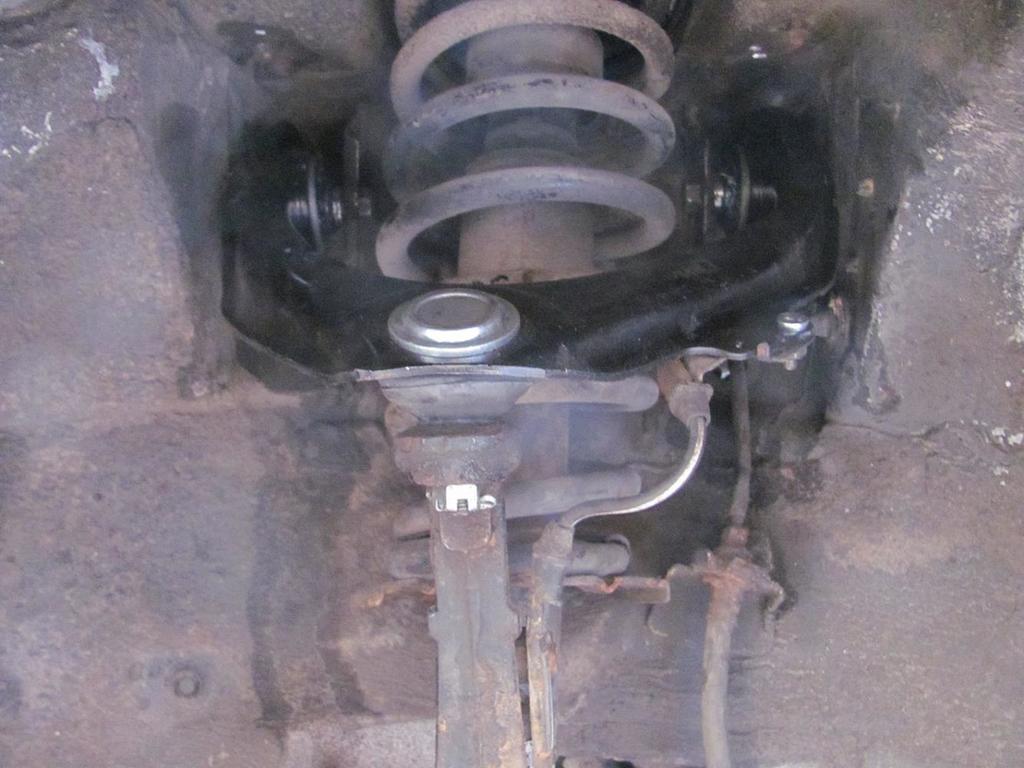
Cheers
Edwin
-
2
-
-
so how did you get them to that stage? there look bad in black (bad is good!!) ?
-
1
-
-
Scooby...you have a very twisted ind sir,seen the horns and that would wake the dead up sir mmmm??
-
NICE ONE Geoff, but since I got my Coupe. the Honda sound system is awesome...don't really see why would you need to change it, bass and high ends are crisp and thumpy respectively .....just saying!!
-
cheers Scooby
yep weird is an understatement....just checked them and they work? I'm gonna order those you recommend and have them as back up.Thanks for the updates and the help. I'll keep you updated guys.
Edwin
-
1
-
-
the very 1st one on the top , length 1.2?
-
hey Stu
is that bad or good when you mean restrictive? I still gotta have the front from the headers as the bright spark welded from the cat to the middle,so I can't even get that yet. Any joy with the other guy concerning the header and cat? I thought the back box's should be restrictive as that would stop the system to breathe,that right? with there back box give a little more back pressure i.e. More HP?
Edwin


Beautifiaction Time for Accord Coupe 2.0ies
in Car Gallery
Posted
a few beautification of my Honda 2.0 ES. leather headrest and rear brake light.